Fitting New Taps

1. If you wish to replace only the taps of an installation, you will need to disconnect the existing ones where they join the supply. First, switch off the supply to both hot and cold, then drain the excess water by opening the taps.

Disconnecting

A This can sometimes be easier said than done. As you have probably discovered, the connections for these (as with many other plumbing connections) are a little awkward to get to. Not only that, but the fact the taps have been fitted for several years often means the connections have ‘welded’ themselves together. This is actually caused by corrosion. There are a couple of ways round this. Try applying a release-oil supplied in spray dispensers. The oil is very fine and when allowed to act for a period of time can sometimes penetrate sufficiently to break the corrosive bond. The second option is to play a little heat on the connection with a blow torch. Do not use a hot air stripper in the vicinity of water. Heat causes expansion of metal and this will almost invariably assist in releasing the bond between components. However, be cautious as heat will damage plastic waste pipes nearby and can crack ceramic basins relatively quickly.

B If possible, try to disconnect the taps from the final connection between them and the supply pipe. That way, you will be left with the maximum amount of pipework onto which to connect the new taps.

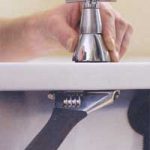
C To reach awkwardly positioned connections, there are several models of tap spanner available to make this job a little easier. The tap spanner is devised so that the head is mounted at right angles to the shaft, enabling leverage to be made from an oblique angle. There are even self-gripping multi-fit multi-angle tap spanners.

D If disconnection close to the tap itself proves too difficult, you will need to cut the pipe or undo a fitting further away from the taps. This will, however, mean a little extra work to extend the pipes to reach the new taps once more.

E Once the connections to the supply pipes have been undone, remove the taps by undoing the retaining nut beneath the basin, and lifting the tap clear.

F Clean off any mounting compound that has been used to seat the base of the tap against the basin.

Replacing

A Check through the manufacturer’s instructions to see where each part fits. New taps are generally supplied with rubber or plastic washers which sit immediately above and below the hole in the basin. These take up pressure when the mounting nut is tightened.

B Mount the taps and fasten them, taking care not to apply too much pressure.

C Adjust the length of the original supply pipes to suit the new taps. This may mean cutting them back or extending them, depending upon the type of tap being fitted. Measure carefully and remember to allow for the connection fitting between the two. If there is room, consider fitting an in-line mini valve to provide a means of easily switching off the supplies for maintenance at a later date.

D It is sometimes more convenient to connect new tails to the taps with the supplied tap connectors and to cut back the existing plumbing to suit. This way, the awkward to get at connection to the tap can be made more easily.

E Connect the supply pipes.

F Switch the water supply back on and inspect the work for signs of leakage.

Fitting a New Bath

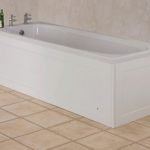
1. Stand the new bath in position and adjust the feet to the required height. Make sure the bath is level. Mark the wall to show the position of the taps and the new waste outlet.

2. Remove the bath.

3. Extend the waste and supply pipes to the vicinity of the marked taps and waste outlet. These should terminate in a location which will still allow you to reposition the bath, but also afford you access to making the final connections. This will prevent the need for you to squeeze your hand between the bath and wall and fiddle with awkward connections.

4. Assemble and fit the waste outlet for the bath. Follow the manufacturer’s instructions regarding the position of gaskets and/or use of sealant. Assemble the overflow pipe. The systems for these vary, but they generally connect back down to the main waste point.

5. Insert and fix the taps again following the manufacturer’s instructions.

6. If the taps have tail pipes with them, shape and fit these. Otherwise, cut a couple of lengths of copper pipe to make your own tails. These should be gently shaped, and long enough to ensure that their connection to the supply pipes can be made in comfort. Fit these to the taps using the supplied tap connectors.

7. Move the bath into position and check all pipe work alignment before securing using the recommended fixings.

8. Connect the tails which you fitted earlier to the supply pipes. It is generally best to use compression fittings to do this. Use of a blowtorch next to a plastic bath is asking for trouble! Consider using in-line isolating valves for the final connection. These will provide a means of switching off the water supply in the case of leaks or for maintenance.

9. Connect the trap to the waste outlet and to the waste pipe. Where space beneath the bath is limited, a shallow trap may be used. But, in this case, the waste must go to a gulley not to a soil stack.

10. Before fitting a side panel to the bath, switch on the water supply and check all work for leaks. This should include the waste.

Don’t forget to check the overflow as well by filling the bath. It is a lot easier to discover a leak now on the overflow rather than relying on a wet ceiling below to tell you.

Fitting A New Basin

1. Hold the basin against the wall and mark the new fixing points. This may require an extra pair of hands. Be sure to get it level and at the right height.

2. Lay the basin on the floor on a protective cloth to prevent scratching.

3. Make suitable fixing points in the wall.

4. Following the manufacturer’s instructions, assemble the taps on the basin. Be sure to fit the supplied washers at the appropriate positions. These are designed to cushion the tap against the surface of the basin so that they do not damage it. Check the direction of the tap before final careful tightening. Do not apply excessive pressure as the basin may crack.

5. Insert the waste outlet into the basin and fix in place. Some outlets are mounted on a rubber gasket – others require a sealing compound or silicone sealant. Check the recommendations. This provides a seal so that water is directed to the inside of the waste pipe rather than the outside.

6. Some modern taps come with small tail pipes which are fitted at the same time as the taps. If not, you may find installation a lot easier if you connect a short length of copper tube to each tap at this stage. These can then be connected to the supply later. The advantage is that you can fit these while the basin is on the floor and you have plenty of working space. Once the basin is mounted on the wall, connecting the pipes to the taps can be very awkward. These tails may be carefully shaped before connection to ensure that they line up with the supply pipe work.

7. Place the basin into position and fix it using the appropriate brackets and screws. Most have a rubber washer for each fixing through which the screw is passed. This will prevent cracking the basin as the screws are tightened.

8. Now connect the hot and cold pipes to the tails fitted earlier. The type of connection used, (soldered or compression) depends on your preference, but keep heat away from the basin. You may like to use the opportunity to fit a small stop valve. This can double as your connecting piece and also provides the facility for you to isolate the supply later.

9. Assemble the waste trap and connect to the waste pipe.

Fitting a new WC

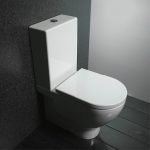
1. When buying a new pan, you will also need to buy a suitable connection piece for the waste outlet. They are push fit connections with multiple fins of rubber to make a watertight seal. There are several different shapes and angles available – angled, straight, offset and radii. Choice will depend on the existing pipe and its position in relation to the pan, as well as the size of the pipe itself. Be sure to take a note of the internal diameter of the soil pipe and the external diameter of the pan outlet. Also sketch out the measurements of the distance and offset of the two pieces.

2. Push the connector piece onto the pan outlet and move the pan into position with the connector going inside the soil pipe. Mark the fixing point of the pan on the floor. Remove the pan and drill and plug these if the floor is of a solid type. For wooden floors, simply drill a small diameter pilot hole for the screws. Remember to check there are no hidden pipes or cables running under the drill holes. Do not fix the pan yet, but line it up again ready.

3. Now, assemble the cistern with all its internal workings following the manufacturer’s instructions and connect it to the pan. This may be via a flush pipe, or the cistern may sit directly onto the pan. Look carefully at the assembly instructions since the correct mounting of all parts is important and may vary from manufacturer to manufacturer.

4. Ensuring that it is level, mark the fixing points for the cistern, lift it out of the way and drill and plug the wall. Reposition the cistern and fix. Note that you must use brass screws since steel ones will corrode in the vicinity of moisture. Generally, the screws are mounted through small rubber gaskets to prevent damage. Be careful not to over-tighten the screws as the ceramic cistern will crack very easily. If needs be, use some off-cuts of small diameter plastic pipe to pack the cistern out from the wall. If you are planning to tile the wall later, put in a couple of temporary packing pieces of wood the thickness of the tiles.

5. Now fix the pan to the floor. Again, use brass screws with rubber washers to prevent cracking the base of the pan.

6. Run the new cold water feed to the cistern and connect it to the ball valve as shown in the instructions. When running this feed, take the opportunity to fit a miniature stop valve in it so that the WC can easily be isolated at a later stage for maintenance. You’ll be pleased you did this if you get a leak when you switch the water back on.

7. Next, connect up the overflow pipe to the cistern. If you do not have an existing one, then a new one will need to be run. This should be 21 mm diameter and run from the cistern, out through an external wall. It should be sited so that an overflow of water will be readily noticed but not cause any damage. Remember that this outlet relies on gravity so it should travel downhill slightly.

8. Switch the water supply back on and check for leaks. The ball valve will need to be adjusted so that the cistern fills to about 20mm below the overflow outlet before stopping.